raintemplates-t7

raintemplates-t5

raintemplates-t5

Theme images by MichaelJay. Powered by Blogger.

Featured Posts

Total Pageviews

Tips And No Tricks

Keys to a Happy Marriage

Lorem ipsum dolor sit amet, consectetur adipiscing elit


Recipes of Happiness

Duis placerat justo eu nunc interdum ultrices.


After You Got Married

Fusce ornare elit nisl, feugiat bibendum lorem.


Effective Methods for Families

Sed eget lacus sit amet risus elementum dictum.


Time with You Family

Etiam pharetra, tellus sit amet congue vulputate, nisi erat.

raintemplates-t3

raintemplates-t3

Find Us On Facebook

Share Us

Latest Posts

Featured Video

Video Of Day

raintemplates-t4

Social Media

raintemplates-t2

Header Ads

Ads

Popular Posts

Facebook Fanpage

Wednesday, May 7, 2014

How to format a computer

How to Format a Computer with Windows 7

Warning - Formatting hard drive information does not permanently erase the data. Even after a computer has been formatted, deleted files can be easily recovered. If you want to permanently wipe your hard drive by completely overwritting hard drive data, check out WipeDrive.
To format your hard disk during Windows 7 installation, you'll need to start, or boot, your computer using the Windows 7 installation disc or USB flash drive.

  1. Turn on your computer so that Windows starts normally, insert the Windows 7 installation disc or USB flash drive, and then shut down your computer.
  2. Restart your computer.
  3. Press any key when prompted, and then follow the instructions that appear.
  4. On the Install Windows page, enter your language and other preferences, and then click Next.
  5. If the Install Windows page doesn't appear, and you're not asked to press any key, you might need to change some system settings. To learn how to do this, see Start your computer from a Windows 7 installation disc or USB flash drive.
On the Please read the license terms page, if you accept the license terms, click I accept the license terms, and then click Next.

On the Which type of installation do you want? page, click Custom.
On the Where do you want to install Windows? page, click Drive options (advanced).
Click the partition that you want to format and click Format.
If you have more than one partition on this hard drive and want to get rid them to make one big drive again, then select a partition and click on the Delete option for each partition. Once you have deleted all of the partitions, select the Unallocated Space partition and click Format.
Pick the formatting option that you want.
When you've finished formatting, click Next.
Follow the instructions to finish installing Windows 7, which include naming your computer and setting up an initial user account.
If you do not want to reinstall Windows 7, you can cancel the installation at this point and keep your newly formatted drives.


How to Format a Computer with Windows Vista

Warning - Formatting hard drive information does not permanently erase the data. Even after a computer has been formatted, deleted files can be easily recovered. If you want to permanently wipe your hard drive by completely overwritting hard drive data, check out WipeDrive.
To format your hard disk during Windows Vista installation, you'll need to start, or boot, your computer using the Windows Vista installation disc or USB flash drive.
  1. Turn on your computer so that Windows starts normally, insert the Windows Vista installation disc, and then shut down your computer.
  2. Restart your computer.
  3. Press any key when prompted, and then follow the instructions that appear.
  4. On the Install Windows page, follow any instructions that are displayed, and then click Install now.
  5. If the Install Windows page doesn't appear, and you're not asked to press any key, you might need to change some system settings. To learn how to do this, see Start Windows from a CD or DVD.
On the Get important updates for installation page, we recommend getting the latest updates to help ensure a successful installation and to help protect your computer against security threats. You will need an Internet connection to get installation updates.
On the Type your product key for activation page, do one of the following:
  1. If you are reinstalling Windows Vista, you should enter your product key now.
  2. If you are not reinstalling Windows Vista, you can skip this step.
On the Please read the license terms page, if you accept the license terms, click I accept the license terms.
On the Which type of installation do you want? page, click Custom.
On the Where do you want to install Windows? page, click Drive options (advanced).
Click the partition that you want to format and click Format
If you have more than one partition on this hard drive and want to get rid them to make one big drive again, then select a partition and click on the Delete option for each partition. Once you have deleted all of the partitions, select the Unallocated Space partition and click Format

Pick the formatting option that you want.
When you've finished formatting, click Next.
Follow the instructions to finish installing Windows Vista, which include naming your computer and setting up an initial user account.
If you do not want to reinstall Windows Vista, you can cancel the installation at this point and keep your newly formatted drives.
Read More
    0

OneDrive and Office Online

Introduction

Microsoft Office Online is a suite of online applications that lets you create Word documents, Excel spreadsheets, and more. You can store the documents you create—plus any other files you want—on Microsoft OneDrive, an online file storage service. Both of these tools are accessible from anywhere with an Internet connection, and both are free.
In this lesson, you'll learn more about the features and advantages of Office Online and OneDrive. You'll also get an idea of what to expect from the rest of this tutorial.
OneDrive was previously known as SkyDrive; Office Online was previously known as Office Web Apps. You may occasionally see references to SkyDrive and Office Web Apps while using these services.
 http://tecidentity.com/wp-content/uploads/2014/02/one-drive.jpg

What is Office Online?

Office Online is a free basic version of the most popular programs in the Microsoft Office suite. It lets you create Word documents, Excel spreadsheets, and more without having to buy or install software. There are four Office Online apps:
  • Word: For creating text documents
  • Excel: For working with spreadsheets
  • PowerPoint: For creating presentations
  • OneNote: For taking and organizing notes
Screenshot of Microsoft OneDrive
You don't need to install anything on your computer to use Office Online. Instead, you work with it online using a service called Microsoft OneDrive.

What is OneDrive?

OneDrive is a free online storage space you can use as your own personal online hard drive. When you create a document with Office Online, it will be saved to your OneDrive. You can store other files there too. Some people refer to this type of online storage as the cloud. Since Office Online and OneDrive are based in the cloud, you can access them from any device with an Internet connection at any time.
Check out our lesson on Web Apps and the Cloud to learn more about the basics of cloud computing.
Once you’ve used Office Online and OneDrive to store files in the cloud, you can edit and share them without ever having to download them to your computer. You can also upload files from your computer, including photos and music. You can even sync your computer and OneDrive so any changes you make to your files are automatically copied between the cloud and your computer. As you can see below, working with the cloud makes all of these things possible.
Using the cloud with Windows OneDrive
To use Offline Online and OneDrive, you'll need a Microsoft account. Getting a Microsoft account will also give you access to features like email and instant messaging. You'll learn how to create an account in our lesson on Getting Started with OneDrive.
Read More
    0

Google Drive and Docs

Google Drive is a free service from Google that allows you to store files from your computer online and access them anywhere using the cloud. Google Drive also gives you access to one of Google's most popular services, Google Docs.
Google Docs is a free, web-based application for creating documents, spreadsheets, and more. In this lesson, you'll learn more about Google Drive and Google Docs and how the cloud can help you in your everyday life.

http://content.gcflearnfree.org/topics/194/drive_intro_intro.png
Read More
    0

Tuesday, April 15, 2014

Computer - Generations

Computer - Generations

Generation in computer terminology is a change in technology a computer is/was being used. Initially, the generation term was used to distinguish between varying hardware technologies. But nowadays, generation includes both hardware and software, which together make up an entire computer system.
There are totally five computer generations known till date. Each generation has been discussed in detail along with their time period, characteristics. We've used approximate dates against each generations which are normally accepted.
Following are the main five generations of computers:


Generation & Description
1First Generation
The period of first generation: 1946-1959. Vacuum tube based.
2Second Generation
The period of second generation: 1959-1965. Transistor based.
3Third Generation
The period of third generation: 1965-1971. Integrated Circuit based.
4Fourth Generation
The period of fourth generation: 1971-1980. VLSI microprocessor based.
5Fifth Generation
The period of fifth generation: 1980-onwards. ULSI microprocessor based

First Generation

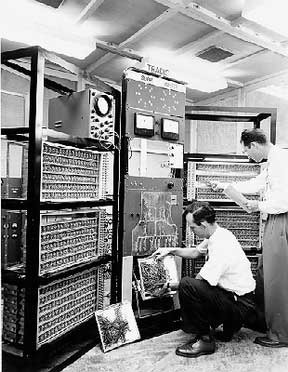
The period of first generation was 1946-1959.
First generation of computers started with using vacuum tubes as the basic components for memory and circuitry for CPU (Central Processing Unit). These tubes like electric bulbs produced a lot of heat and were prone to frequent fusing of the installations, therefore, were very expensive and could be afforded only by very large organisations.
In this generation, mainly batch processing operating systems were used. In this generation, Punched cards, Paper tape, Magnetic tape Input & Output device were used.
There were machine codes and electric wired board languages used.
First Generation Computers The main features of First Generation are:
  • Vacuum tube technology
  • Unreliable
  • Supported Machine language only
  • Very costly
  • Generate lot of heat
  • Slow Input/Output device
  • Huge size
  • Need of A.C.
  • Non-portable
  • Consumed lot of electricity
Some computers of this generation were:
  • ENIAC
  • EDVAC
  • UNIVAC
  • IBM-701
  • IBM-650

Second Generation

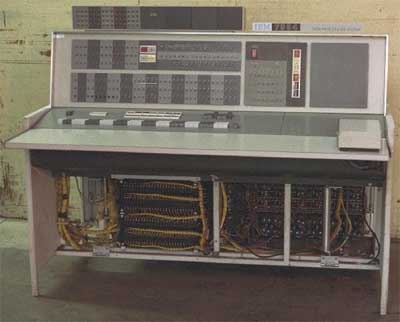
The period of second generation was 1959-1965.
This generation using the transistor were cheaper, consumed less power, more compact in size, more reliable and faster than the first generation machines made of vacuum tubes. In this generation, magnetic cores were used as primary memory and magnetic tape and magnetic disks as secondary storage devices.
In this generation, assembly language and high-level programming language like FORTRAN, COBOL were used.
There were Batch processing and Multiprogramming Operating system used.
Second Generation Computers The main features of Second Generation are:
  • Use of transistors
  • Reliable as compared to First generation computers
  • Smaller size as compared to First generation computers
  • Generate less heat as compared to First generation computers
  • Consumed less electricity as compared to First generation computers
  • Faster than first generation computers
  • Still very costly
  • A.C. needed
  • Support machine and assembly languages
Some computers of this generation were:
  • IBM 1620
  • IBM 7094
  • CDC 1604
  • CDC 3600
  • UNIVAC 1108

Third Generation

The period of third generation was 1965-1971.
The third generation of computer is marked by the use of Integrated Circuits (IC's) in place of transistors. A single IC has many transistors, resistors and capacitors along with the associated circuitry. The IC was invented by Jack Kilby. This development made computers smaller in size, reliable and efficient.
In this generation, Remote processing, Time-sharing, Real-time, Multi-programming Operating System were used.
High-level language (FORTRAN-II TO IV, COBOL, PASCAL PL/1, BASIC, ALGOL-68, etc.) were used during this generation.
Third Generation Computers The main features of Third Generation are:
  • IC used
  • More reliable
  • Smaller size
  • Generate less heat
  • Faster
  • Lesser maintenance
  • Still costly
  • A.C. needed
  • Consumed lesser electricity
  • Support high-level language
Some computers of this generation were:

  • IBM-360 series
  • Honeywell-6000 series
  • PDP(Personal Data Processor)
  • IBM-370/168
  • TDC-316

Fourth Generation

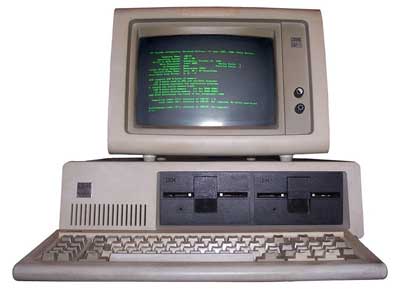
The period of Fourth Generation was 1971-1980.
The fourth generation of computers is marked by the use of Very Large Scale Integrated (VLSI) circuits. VLSI circuits having about 5000 transistors and other circuit elements and their associated circuits on a single chip made it possible to have microcomputers of fourth generation. Fourth Generation computers became more powerful, compact, reliable, and affordable. As a result, it gave rise to personal computer (PC) revolution.
In this generation, Time sharing, Real time, Networks, Distributed Operating System were used.
All the higher level languages like C and C++, DBASE, etc., were used in this generation.
Fourth Generation Computers The main features of Fourth Generation are:
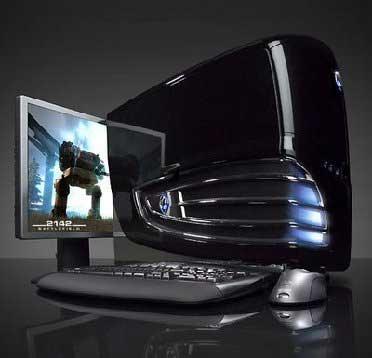
  • VLSI technology used
  • Very cheap
  • Portable and reliable
  • Use of PC's
  • Very small size
  • Pipeline processing
  • No A.C. needed
  • Concept of internet was introduced
  • Great developments in the fields of networks
  • Computers became easily available
Some computers of this generation were:
  • DEC 10
  • STAR 1000
  • PDP 11
  • CRAY-1 (Super Computer)
  • CRAY-X-MP (Super Computer)

Fifth Generation

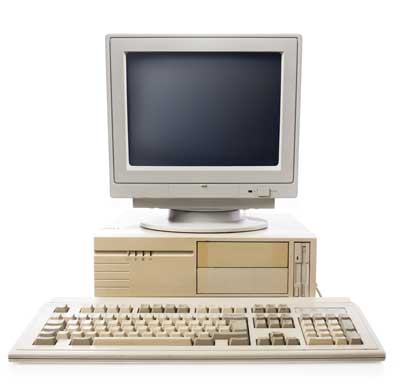
The period of Fifth Generation is 1980-till date.
In the fifth generation, the VLSI technology became ULSI (Ultra Large Scale Integration) technology, resulting in the production of microprocessor chips having ten million electronic components.
This generation is based on parallel processing hardware and AI (Artificial Intelligence) software.
AI is an emerging branch in computer science which interprets means and methods of making computers think like human beings.
All the higher level languages like C and C++, Java, .Net, etc., are used in this generation.
AI includes:
  • Robotics
  • Neural networks
  • Game Playing
  • Development of expert systems to make decisions in real life situations.
  • Natural language understanding and generation.
Fifth Generation Computers The main features of Fifth Generation are:
  • ULSI technology
  • Development of true artificial intelligence
  • Development of Natural language processing
  • Advancement in Parallel Processing
  • Advancement in Superconductor technology
  • More user friendly interfaces with multimedia features
  • Availability of very powerful and compact computers at cheaper rates
Some computers types of this generation are:
  • Desktop
  • Laptop
  • NoteBook
  • UltraBook
  • ChromeBook

More Information in Tamil Please Visit  Thanushker.blogspot.com

Read More
    0

Tuesday, April 8, 2014

How Its Made - Memory Cards


Read More
    1

Saturday, March 29, 2014

How to improve fps in PC games: 5 tips to get more frames per second


Make your favourite games run faster for free


1. Improve fps: Get the latest drivers for your graphics card

Running old drivers isn't a good idea if you want the best performance, but a surprising number of people fail to update to the latest versions. It's much easier these days (with certain brands, at least) since pop-up notifications tell you when a new driver is available.
First, find out which graphics card you have, and also check which version of Windows your PC is running. Head to Device Manager in the Control Panel and click on Display adapters. You'll see the name of your graphics card.
Improve fps - check graphics card
To find out the specific version of Windows, right-click on My Computer and choose Properties (or click on System in the Control Panel). This will tell you whether you have the 32- or 64-bit, as well as exactly which version of Windows is installed.
Then, head to the relevant website to get the latest drivers. This will be either Intel, Nvidia or AMD. Don't go to the card manufacturer's site, such as Asus, MSI, Gigabyte or Sapphire. Be sure to choose the correct model of card, and the appropriate operating system.
Once downloaded, install the drivers and reboot your PC if necessary. Depending on the game, you might get up to 30 percent better performance with just a driver update.
Improve fps - drivers
Similarly, check if there's an update to the game itself. If you bought it via Steam, it should be updated automatically. Otherwise, check the game developer's website.
Finally, make sure Windows itself is fully up to date. Unless you chose to disable the feature, updates should be installed automatically. If they're not, search the Start menu (or Start screen in Windows 8) for Windows Update.

2. Improve fps: Optimise game settings

Updating drivers will get you only so far. The biggest gains in frames per second come from tweaking and compromising on graphics settings.
Ideally, you want to run your game at your monitor's native resolution. For most PCs that's 1920x1080; on a laptop it's likely to be 1366x768. To find out your monitor's resolution, right-click on the desktop in Windows 7 or 8 and click on Screen resolution. In earlier versions, click Properties instead.
The highest selectable resolution should tell you the native resolution, and should say 'recommended'. You can also search Google for your monitor's make and model if you're still unsure.
Lowering the resolution should give you more frames per second, but don't adjust the resolution here. Instead, load your chosen game and look for the graphics settings. Here you can change the resolution and many other settings.
Anti-aliasing is one setting to watch out for. AA smoothes out jagged lines, but incurs a performance penalty. Typically you'll see a slider, but it might be just a number, such as 2x, 4x 8x etc. First, try disabling AA altogether and see how your game plays. If it's fast enough, you can enable AA again at the lowest setting and progressively increase it until you find the best balance between quality and performance.
Improve fps - game settings
The same sentiment goes for most other graphics settings, including draw distance and shadows. Lighting effects, including shadows, tend to be real performance drains, so if you can live with basic effects, you can make the difference between a game being unplayable and playable.
Essentially, it's a process of trial and error. Unless, that is, your graphics card drivers can optimise each game's settings to work well using the hardware available. For example, the Nvidia card in our test PC has drivers which can do precisely that.
Improve fps - automatic optimisation

3. Improve fps: Check and benchmark performance

If your game has an FPS readout (you will need to enable this somewhere in the options, or install a third-party utility such as FRAPS), you'll be able to see how fast it's running. The minimum figure (on average) that you want is 25 frames per second. Anything less looks jerky.
The fps will vary depending on what's happening on-screen. When there's lots of action, it can drop considerably, so aim for graphical settings at which the game will run acceptably when that happens.

4. Improve fps: Overclock your hardware

This isn't something we recommend for everyone, but if you know what you're doing and understand that there's a risk of breaking your graphics card, CPU and RAM, you can run them faster. This should give you a few extra fps.
Your first port of call should be the graphics card, since this has the most direct impact on fps. You may find an option to overclock the GPU in the driver itself (launch the interface from the relevant icon in Windows' Notification area). Alternatively, you might need to track down third-party software.
Overclocking the CPU and RAM is easier, as you should find the settings in your PC's BIOS. Simply reboot, press Delete (or whichever key takes you to the BIOS) and look for the performance settings.

5. Improve fps: Use optimisation software

Lots of programs run in the background in Windows, and they use up resources including memory and CPU time. You can use PC optimisation utilities to ensure there are no superfluous processes running that could hamper game performance. You can also clear out temporary files and defragment your hard drive (don't do this on an SSD though).
Windows includes some optimisation tools, but you can also try Razer Game Booster which does a lot of the hard work for you. One version works with Windows Vista 7 and 8, and there's a separate download for XP.

Read More
    0

Thursday, March 27, 2014

Insurance policy

General features

The insurance contract or agreement is a contract whereby the insurer will pay the insured (the person whom benefits would be paid to, or on behalf of), if certain defined events occur. Subject to the "fortuity principle", the event must be uncertain. The uncertainty can be either as to when the event will happen (e.g. in a life insurance policy, the time of the insured's death is uncertain) or as to if it will happen at all (e.g. in a fire insurance policy, whether or not a fire will occur at all).

  • Insurance contracts are generally considered contracts of adhesion because the insurer draws up the contract and the insured has little or no ability to make material changes to it. This is interpreted to mean that the insurer bears the burden if there is any ambiguity in any terms of the contract. Insurance policies are sold without the policyholder even seeing a copy of the contract.[1]:27 In 1970 Robert Keeton suggested that many courts were actually applying 'reasonable expectations' rather than interpreting ambiguities, which he called the 'reasonable expectations doctrine'. This doctrine has been controversial, with some courts adopting it and others explicitly rejecting it.[3] In several jurisdictions, including California, Wyoming, and Pennsylvania, the insured is bound by clear and conspicuous terms in the contract even if the evidence suggests that the insured did not read or understand them.[4][5][6]
  • Insurance contracts are aleatory in that the amounts exchanged by the insured and insurer are unequal and depend upon uncertain future events. In contrast, ordinary non-insurance contracts are commutative in that the amounts (or values) exchanged are usually intended by the parties to be roughly equal. This distinction is particularly important in the context of exotic products like finite risk insurance which contain "commutation" provisions.
  • Insurance contracts are unilateral, meaning that only the insurer makes legally enforceable promises in the contract. The insured is not required to pay the premiums, but the insurer is required to pay the benefits under the contract if the insured has paid the premiums and met certain other basic provisions.
  • Insurance contracts are governed by the principle of utmost good faith (uberrima fides) which requires both parties of the insurance contact to deal in good faith and in particular it imparts on the insured a duty to disclose all material facts which relate to the risk to be covered. This contrasts with the legal doctrine that covers most other types of contracts, caveat emptor (let the buyer beware). In the United States, the insured can sue an insurer in tort for acting in bad faith.


Structure

Early insurance contracts tended to be written on the basis of every single type of risk (where risks were defined extremely narrowly), and a separate premium was calculated and charged for each. This structure proved unsustainable in the context of the Second Industrial Revolution, in that a typical large conglomerate might have dozens of types of risks to insure against.
In the 1940s, the insurance industry shifted to the current system where covered risks are initially defined broadly in an insuring agreement on a general policy form (e.g., "We will pay all sums that the insured becomes legally obligated to pay as damages..."), then narrowed down by subsequent exclusion clauses (e.g., "This insurance does not apply to..."). If the insured desires coverage for a risk taken out by an exclusion on the standard form, the insured can sometimes pay an additional premium for an endorsement to the policy that overrides the exclusion.
Insurers have been criticized in some quarters for the development of complex policies with layers of interactions between coverage clauses, conditions, exclusions, and exceptions to exclusions. In a case interpreting one ancestor of the modern "products-completed operations hazard" clause, the Supreme Court of California complained:
The instant case presents yet another illustration of the dangers of the present complex structuring of insurance policies. Unfortunately the insurance industry has become addicted to the practice of building into policies one condition or exception upon another in the shape of a linguistic Tower of Babel. We join other courts in decrying a trend which both plunges the insured into a state of uncertainty and burdens the judiciary with the task of resolving it. We reiterate our plea for clarity and simplicity in policies that fulfill so important a public service.[7]


Parts of an insurance contract

  • Declarations - identifies who is an insured, the insured's address, the insuring company, what risks or property are covered, the policy limits (amount of insurance), any applicable deductibles, the policy period and premium amount. These are usually provided on a form that is filled out by the insurer based on the insured's application and attached on top of or inserted within the first few pages of the standard policy form.
  • Definitions - define important terms used in the policy language.
  • Insuring agreement - describes the covered perils, or risks assumed, or nature of coverage, or makes some reference to the contractual agreement between insurer and insured. It summarizes the major promises of the insurance company, as well as stating what is covered.
  • Exclusions - take coverage away from the Insuring Agreement by describing property, perils, hazards or losses arising from specific causes which are not covered by the policy.
  • Conditions - provisions, rules of conduct, duties and obligations required for coverage. If policy conditions are not met, the insurer can deny the claim.
  • Endorsements - additional forms attached to the policy form that modify it in some way, either unconditionally or upon the existence of some condition. Endorsements can make policies difficult to read for nonlawyers; they may modify or delete clauses located several pages earlier in the standard insuring agreement, or even modify each other. Because it is very risky to allow nonlawyer underwriters to directly rewrite core policy language with word processors, insurers usually direct underwriters to modify standard forms by attaching endorsements preapproved by counsel for various common modifications.
  • Policy riders - A policy rider is used to convey the terms of a policy amendment and the amendment thereby becomes part of the policy. Riders are dated and numbered so that both insurer and policyholder can determine provisions and the benefit level. Common riders to group medical plans involve name changes, change to eligible classes of employees, change in level of benefits, or the addition of a managed care arrangement such as an Health Maintenance Organization or Preferred Provider Organization (PPO).[8]
  • Policy jackets - A policy jacket is a cover, binder, envelope, or presentation folder with pockets in which the policy may be delivered. Historically, standard boilerplate provisions common to an entire family of policies were often printed on the jacket itself; then the underwriter would type up the declarations form and insert that form along with insuring agreement and endorsement forms into the jacket to assemble a complete policy. They are increasingly rare because jackets do not feed through automatic document feeders and must be manually copied or scanned in order to produce a complete image of the entire policy text.
Read More
    0

Services

More Services

© 2014 Gonewtec. Designed by Bloggertheme9
Powered by Blogger.